6.30.2012

dino t-shirt


I had heard such wonderful things about using freezer paper for art projects but had never given it a shot. I figured it was time to give it go... so I decided to make this little guy t-shirt for a friend of mine's son who just turned 1. I used the same little dinosaur from this project and I think he turned out pretty cute!

___________________________________________

Here's what you'll need to make your own:


t-shirt (pre-washed)
fabric paint
foam brush
freezer paper
pencil
exacto blade/scissors
scrap piece of cardboard
iron/ironing board
design
___________________________________________

6.25.2012

paint swatch bookmark

Since I've been on a paint swatch kick, I figured...why stop now? If the paint swatch notebooks aren't your cup of tea, maybe you'll like this project better for using up your leftover paint swatches.


Cute and simple right?
____________________________________________________

Here's what you'll need to make your own:

Paint swatches
transfer carbon paper
hole punch
ball point pen
piece of ribbon or hemp
design of your choice
____________________________________________________

6.22.2012

light turned candle holder

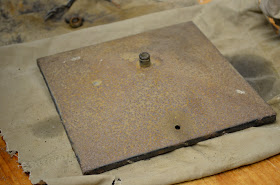
On one of our recent trips to Resource York, my husband and I stumbled upon a very rusty & dusty light. I loved it right away, with it's swirly glass and all. Adam looked at it, decided that we could avoid rewiring it by turning it into a candle holder. Sold.


We got home and took that sucker apart. It was dirty and had dead bugs in it, but with a little soap and water, it was beginning to look better already.


With a little elbow grease and steel wool, Adam scrubbed up the black metal frame. 
When it came to the lid, we decided that it was too rusty to salvage.


Bummer, right?! Well, not entirely...
The rustiness inspired a new idea: turn the light over and make a new base for it.

6.14.2012

mint tea

One of the many things Adam and I have in common is this: 
we both love mint tea (& mojitos)

This Spring we got the itch to plant a little herb garden. Seeing as though I have a black thumb, we decided to plant something we knew we both hopefully wouldn't kill... MINT!


We took a little trip to Stauffer's and we brought home three plants...
we could already smell it's potential.


When we got home, we didn't really like any of our pots that we had on hand to plant our mint. So we decided to make our own... and let me clarify, when I say "we"... I mean to say my husband. He built the whole thing by himself (I only helped carry it outside - it's heavy).

6.09.2012

quote art

I've really been itching to make some wall art for our house lately. It might be because of of these little dinosaur pictures or this flower picture... but whatever the reason, I got crafty and ended up with this little guy:


It's only a 6x6 wood frame [which is good - because it's just the right amount of "cheesiness" for our home]. The quote is from a small exert of our wedding ceremony where we planted a tree [which is now out front of our house]. We love it.

photo by the wonderful  heather brincko
Our Service Berry tree

Anyway, back to the picture. 
_________________________________________________________

Here is what you'll need to make your own:

any size wood board (mine was 6x6 from Walmart)
letter stickers (sized to fit on your board)
ruler & pencil
foam brush
craft paint
_________________________________________________________

6.05.2012

little fabric flower


I can't take ANY credit for this flower whatsoever....[other than the fact that I made this one].... because I used a pattern that I found here. I couldn't get over how cute it was so I decided to make some of my own.    I followed the pattern pretty much step by step, but I thought my step-by-step was worth sharing. So without further ado... Here goes!

_____________________________________________

Here's what you'll need to make your own:


enough fabric for (6) 3.5" squares, (6) 2.5" squares and a button cover
fabric glue, scissors, needle, thread, etc.
cardboard for a template (optional)
button covering kit

_____________________________________________