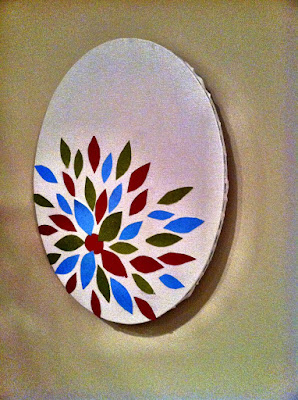
Dana from Lets Meet For Lunch is here today to share a fun and creative DIY project. I'm already itching to make one for myself. Enjoy [and check out my Apple Dumpling recipe on Dana's blog here]. There's nothing wrong with eating and crafting at the same time!
DIY Flower Picture
Hey Sewing Barefoot readers! I am so excited to be here today with a little DIY project of mine. I’ve always loved crafts and DIY stuff of all kinds. I was even an Arts & Crafts Counselor at a summer camp for 4 years running in college (Listen, it was that, or being an Athletics Counselor... which was completely and TOTALLY out of the question). I’m not always the best at them, and my stuff hardly looks professional... no judging! I’m sure you could do far cooler things than I did with this little project, but the thing I like about it is that anyone can do this. The hardest part is cutting out the petals and deciding where you want to place them. If you used a template, they would look even more consistent, but I kind of liked the idea of free-form petals. You can do whatever you want to get the effect you are going for!
I normally take a picture of all materials needed, but for some reason I became a cutting fiend and totally forgot that part. So imagine that you have a picture here of some scrapbook paper in varying colors/patterns that you want, and scissors. A little further on I’ll show you what else you need.
Cut some strips of the paper, about the size that you want the petals to be. I made mine around 2 inches. Then stack the sheets on top of each other, to make quick work of cutting them (I have 6 stacked up in the picture).
Cut some strips of the paper, about the size that you want the petals to be. I made mine around 2 inches. Then stack the sheets on top of each other, to make quick work of cutting them (I have 6 stacked up in the picture).
Cut some strips of the paper, about the size that you want the petals to be. I made mine around 2 inches. Then stack the sheets on top of each other, to make quick work of cutting them (I have 6 stacked up in the picture).
Also, cut a circle out of one piece of paper for the center of your flower. By the way, yes, that is a blanket in the background of my picture. I totally did this while catching up on my DVR shows.
When you are ready to make your design, you’ll need Mod Podge, a paintbrush, and a blank canvas, any shape you like. All I had was an oval, but a rectangle would be great, too.
When you are ready to make your design, you’ll need Mod Podge, a paintbrush, and a blank canvas, any shape you like. All I had was an oval, but a rectangle would be great, too.
Start by spreading a thin layer of Mod Podge on a small area of the canvas. Don’t go too far, because it dries quickly!
Begin by placing the circle wherever you want the center of your flower to be, then center several petals out around it (I ended up moving my petals closer to the center later on... I didn’t like the “spaced out” look quite as much when I saw the whole thing come together). Cover them with a thin layer of Mod Podge, then continue outward.
Cover everything with one last layer, then allow to dry overnight. The next day, cut off the edges of the petals that extend. And ta-da!! I didn’t have a particular room that I needed a picture in, so I just chose these colors because I like them. I will probably use it in my new bathroom, because I have yet to decide how I want to decorate in there. I just moved into a new home, so we are in the process of organizing and decorating!
Make sure you stop by my blog to check out Shannon’s delicious homemade Apple Dumplings by clicking here!!


Whoa! That's an amazing tutorial. I'm not so good at DIY'ing stuffs but I think I can do this one. Thanks for sharing.
ReplyDelete