search this blog

3.26.2012

pin Jar

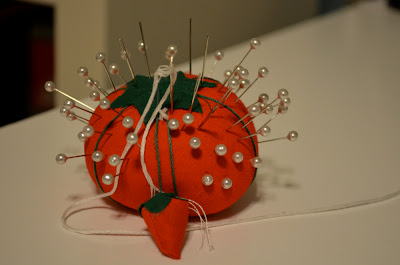
Yes, I have a tomato pin cushion. Doesn't everyone? [oh wait...they don't? hmmm]


I thought it was time to update my pin cushion situation. I find that my little tomato just wasn't cutting it. It would slide around my sewing table when I tried to put pins in it and it was starting to look a little rough. I saw this idea on pinterest and decided to give it a try...

I didn't read the tutorial on other pin cushions jars before I started because it was one of those "I'm going to do this right now" kind of ideas. Once I was finished, I browsed some other tutorials and found that they went about constructing their pin cushion a little differently. Either way you do it, they turn out cute so you can pick which way works better for you. This is how I made mine...
______________________________________________________

Here's what you'll need:


1. Any type of jar (with lid)
2. hot glue gun
3. scrap fabric
4. stuffing
______________________________________________________

3.21.2012

what "to do"...what "to do"

I make lists. 

If it's in my head...I usually need to get it down on paper something before I forget it. I'm guilty of even writing "make a list" on my to-do list, just so I have something to cross off when I'm done. I know...I'm a loser amazing! I constantly have lists going on my phone, on a scrap of paper at work, or even on a paper plate... (we went through a few "paper plate to do lists" when we first bought the house).


Lately, I've thought it would be nice to have my own personalized "to-do" list that I could print out, write all over, and then throw away when I'm done with it. 

Of course, I couldn't find anything that I really liked so I had to make my own. 

Here is what I came up with:


3.13.2012

"it's a cinch" bag


Every once in a while I find something really great on Pinterest that gives me that excited/panicky/flustered feeling of “I have to make this right now!” When I saw this bag, I knew I needed one…like…right away.

When my mom was in town, we took a trip to Joann’s to pick up some fabric and a zipper and we got to work. It took us a few short sewing sessions to finish and I love how it turned out. Plus, it was a nice project to do with my mom because I only had to turn one of the drawstrings inside out after sewing it (she did the other – and believe me…that was the hardest part of this whole bag).

I followed the pattern pretty much step by step. The instructions were clear and helpful. I used a pretty patterned quilt-weight fabric for the exterior (as well as the interior pockets that I added on my own) and a black linen fabric for the straps, draw strings and interior lining.


Find the bag pattern HERE.
Find the zippered lining tutorial HERE.


3.08.2012

"whale" onesie

I've been making a lot of baby-related crafts lately because I know a lot of people having babies this year. I love to give handmade gifts. For me, making something allows me to give a gift that is special without going broke - I get into trouble at kid's stores. I end up wanting to buy EVERYTHING.

My latest creations? Appliqued animal onesies...


My parents got me a new contraption for Christmas that has made my onesie-making a lot more fun. They got me a Slice Fabrique - a little contraption that is programmed to cut a bunch of fun designs out of fabric. I've been playing around with it a little and love the endless possibilities. My brothers got me the "Animal Frenzy" design card that I used to make the the whale and penquin appliques.


Since I know not everyone has access to a Slice machine - and many don't have the interest in purchasing one - I decided I'd make a little tutorial on one of the more simple applique patterns that could easily be cut out by hand - A WHALE!
_______________________________________________

Here is what you'll need to make your onesie:

a onesie (any size you choose)
Sewing machine (or needle and thread if you choose to sew by hand)
Heat N Bond Lite
iron/ironing board
a small piece of embroidery thread (for the eye)
3-4 coordinating fabrics (small amounts)
_______________________________________________

3.03.2012

recovered lampshade


Ever since I painted an accent wall in our home office/craft room… I’ve been dying to bring in some fun fabrics and accents. Years ago, I bought a set of clip lamps from Pier 1 on super sale. I loved how they clipped onto each end of my futon in my college studio apartment in Seattle. Since moving into our new home, they haven’t quite found a home for themselves yet…and have actually been split up into 2 locations. One of them is clipped on to my sewing table. I was never really fond of the lamp shades, but they were neutral and worked well in my old space. Up against my white table and white bookshelves, the lamp shade was looking pretty blah…

So I decided to spruce it up with some fun fabric.

_______________________________________________________________

Here is what you’ll need to make your own fabric covered lamp shade:


a lamp shade [of course]
a piece of fabric big enough to wrap around your shade
a hot glue gun
coordinating ribbon
iron/ironing board
_______________________________________________________________

Related Posts Plugin for WordPress, Blogger...