

Little girls in headbands are something that I absolutely love. This tutorial is simple and fun - and in 1 hours time you'll have an adorable headband to give to a friend or to keep for your own little one.
____________________________________
Here is what you'll need:

1. Felt (any color you choose)
2. Elastic ribbon
3. Scissors
4. Pinking sheers
5. Rotary cutter (optional)
6. Hot glue gun
7. Scrap piece of cardboard (a cereal box works great)
[NOTE: I chose to use hot glue because I'm impatient and I don't like to wait for regular glue to dry. Just be warned that you might burn your fingers constructing the flower petals with hot glue... You could always use a regular fabric glue in place of the hot glue].
____________________________________
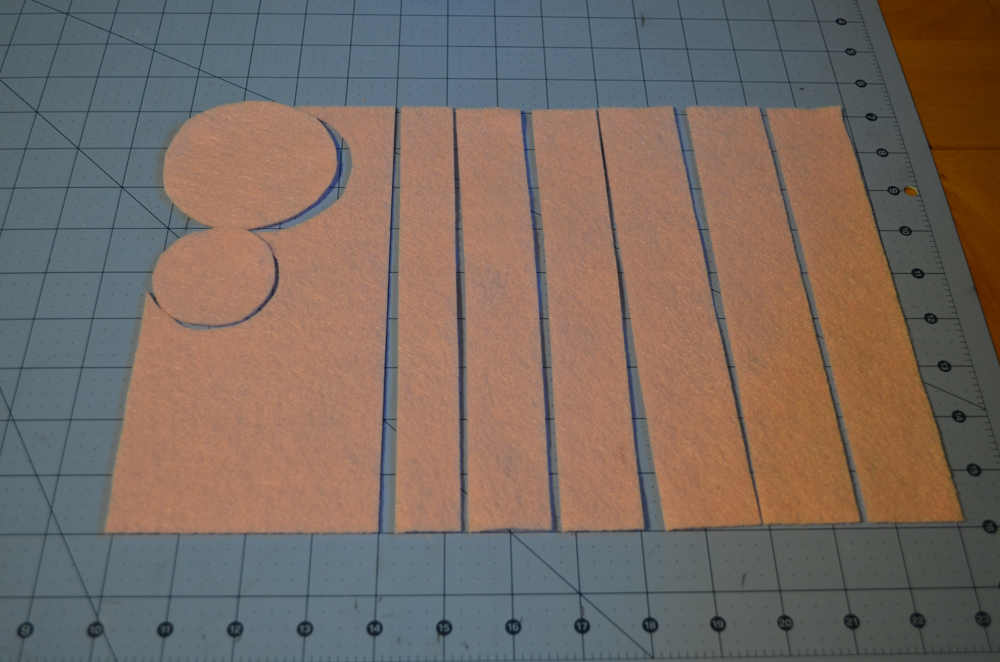
Start off by cutting a 3-1/4" circle from your scrap cardboard.
I did this so I could use it as a template for additional flowers. If you plan to make just one flower,
skip this step and draw your circle right on your felt.
Trace your circle onto the top right corner of your felt.

Repeat the step above, only this time cut a 2" circle out of your cardboard.
Trace your second circle below your first and set your cardboard aside. You'll need it in a few minutes.

Starting at the opposite end of your circles, cut strips in your felt. You'll need:
3 - 1.5" strips
2 - 1.25" strips
1 - 1" strip
 |
| Save the left over felt for later |
Next, cut your strips into squares.
Your squares will be 1.5x1.5, 1.25x1.25 and 1x1.

Cut your squares into the shape of a petal.
 |
| Don't worry, they don't all have to be identical. |
Now you are ready to glue. Plug in your hot glue gun and try not to burn yourself!
Put a small dot of hot glue on the bottom middle of your petal.
Fold petal over to smear glue then press both sides of the petal toward the middle.
Hold for a few seconds to allow glue to dry.


Repeat with all of your petals.
I ended up using 15 large, 13 medium and 10 small petals for this flower (each one is a little different).


Now it is time to prep your base.
Glue the 2" cardboard you cut out earlier to the 3-1/4" piece of felt you cut out when you first started.
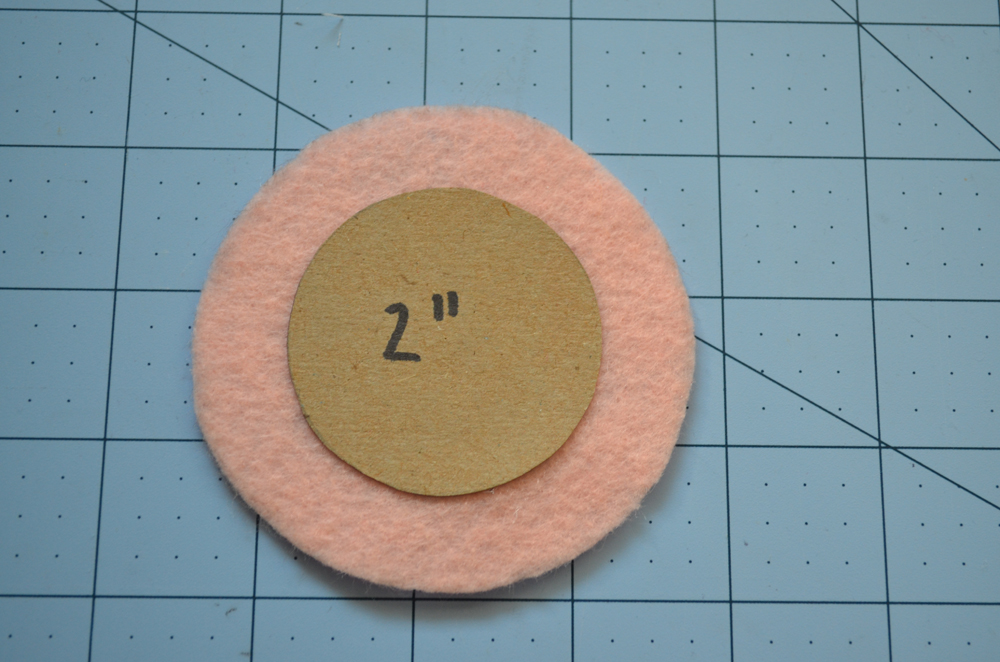
Fold up and glue your edges around [making it as flat as possible].


Now you'll start attaching your petals.
Start with your largest petals first [the ones you made from you 1.5"x1.5" squares].
Glue as many as possible around your felt circle.


Continue glueing your petals onto your flower, fitting as many in as possible. The second row will consist of the petals made from the 1.25x1.25 squares and the third row will be from the 1x1 squares.


To finish off the center, cut two small circles out of your remaining felt with your pinking sheers.
Glue and press your first circle into the center of your flower.
Glue and pinch your second circle - then glue it into the middle.


Figure out what size to make you elastic ribbon (I like to use this website).
Sew your elastic ribbon together and glue to the back of your flower.
Glue your 2" piece of felt on to cover your elastic and finish off the back of your flower.


You're done!
Now you have an adorable little headband.
This flowers also make great hairpins or brooches. The options are endless.


gorgeous!
ReplyDelete