search this blog

10.30.2013

"look for less" design challenge


When I was contacted to be part of a "Look for Less" design challenge with some other amazing bloggers, I jumped at the opportunity. The idea behind this challenge was to find a look I loved but was too expensive for my taste or budget, then DIY it myself for less. 
Please meet the other girls participating in the challenge:
Rachel | Like a Saturday
Andrea | Life Love Larson
Kayla Home Coming


My "Look for Less" project:
DIY Anthropologie Tee-pee Coasters


When I stumbled across these adorable linen coasters on the Anthropologie website, I was immediately smitten. I am a firm believer that you can never have too many coasters around. Even though I do shop at Anthropologie for unique home decor items, I couldn't justify spending money on something I knew I could make. My coasters turned out to be free since I had all of the materials on hand from other projects. If you were to buy the linen & embroidery thread to complete this project you'd probably spend around $5.00 - $7.00.

... what you'll need to make your own ...
(list below makes 4 coasters)

8 - 5"x5" pieces of linen
4 - 5"x5" pieces of fusible white felt
brown embroidery thread
sewing machine/thread
pencil
needle
ruler

... instructions ...

STEP [1]
Cut out 8 - 5"x5" linen pieces (2 pieces per coaster). With a pencil & ruler, doodle your tee-pee design on your linen. I didn't worry about making each tee-pee identical. 


STEP [2]
Cut out 4 - 5"x5" pieces of fusible felt (1 piece for each coaster). Iron the felt to the back of the 4 pieces of linen that have tee-pees drawn on them. The felt will help stabilize your stitching and give your coasters some loft.


STEP [3]
With your needle & embroidery thread, begin stitching the outline of the tee-pee. Once the outline is complete, fill in the center of the tee-pee with diagonal stitches across the design.

STEP [4]
With the extra 4 pieces of linen, sew the right sides of your coasters together (your felt should be facing out) leaving a small space to turn your coaster right side out. Press flat & top stitch about 1/8" in around the entire coaster to close the space used to turn your coaster. Ta-da! You've completed your first coaster. Repeat all steps for the remaining 3 coasters.

Click on the images below to check out all of the other amazing "Look for Less" projects completed during this design challenge:
 http://likeasaturday.com/2013/10/30/look-for-less-drink-station/
 http://gracelangdon.blogspot.com/2013/10/design-challenge-look-for-less.html


Photobucket
[p.s. this post may be linked to any number of these blogs]

10.29.2013

fall party decor

My cousin got married a few weekends ago and my aunt put on one of the best rehearsal dinners I have ever been to. It was so well thought out and perfectly decorated. I thought I'd share some of these handmade decorations since they would work for more than just a rehearsal dinner. They could be the perfect decoration for your fall table, Thanksgiving dinner place settings and much more. Enjoy :)


Photobucket
[p.s. this post may be linked to any number of these blogs]

10.28.2013

"caught a bug?" card

It's flu season!
No... I'm not excited, but I am preparing my card stash for it. I saw this adorable "caught a bug" card on Pinterest the other day and I knew I had to recreate it for myself. 

INSPIRATION                                    CARD FOR MY STASH

Since I have a decent stash of rubber stamps, this took me all of 5 minutes to create. I stamped a mason jar & bug on some card stock, layered it onto a bright green piece of card stock, stamped on "caught a bug?" and adhered it to a blank card. This could easily be recreated by sketching it by hand.
I now have a few "caught a bug" cards to add to my yearly card binder

Photobucket
[p.s. this post may be linked to any number of these blogs]

10.24.2013

wayfair giveaway

note: I was not paid or perked to write this post 
all opinions stated below are my own

As an interior designer, and a girl who LOVES a good deal, I have always been a big fan of Wayfair.com. It is like one big "eye candy" store! So many different colors, styles & textures in every type of furniture and decor you can think of. The other day, Wayfair's managing editor, Catie Parrish, shared a post about the 4 Things To Consider Before Your Next Big Area Rug Purchase. Just for fun I put together a concept board for our master bedroom (a room in my house that is in desperate need of a makeover). Yellow is one of my favorite colors and I am absolutely smitten with that area rug!

duvet | headboard | tall dresser | night stand | dresser | yellow lamp | yellow rug | art | shell dish | pillow

Are there certain items you've been drooling over but haven't found the right reason to order yet? Well... you're in luck! Wayfair has generously offered up a $100 gift card to one lucky winner to add some style into your own home. Use the rafflecopter below to enter. Good luck! (Open to U.S. residents only)

a Rafflecopter giveaway

Photobucket

10.23.2013

guest post: 4 Things to Consider Before Your Next Big Rug Investment

*** enter to win a $100 Wayfair.com gift card HERE ***

Take a look at these important rug features before you take the plunge.


1.     Measurements
There’s no way around it—busting out that tape measure before you purchase a rug is an absolute must. Carefully evaluate the space where you want to place the rug and consider how it will fit with other items in the room. Take a look at what furniture will be on the rug as well as how other furniture will look positioned next to it. If you have a clear vision of exactly where the rug will be placed before you purchase, it will ensure the best possible look and usability of the rug in your space. For the best look, choose a rug that’s large enough so that all the legs (or at least the front legs) of your major furniture pieces will sit on the rug.

2.     Materials
Location is paramount when considering the material and price of a rug. If it will be placed in a high-traffic area or room, then splurging on handmade, 100% wool will offer the best results. Rugs made from less expensive synthetic fibers won’t last as long, but can be useful in a quieter space as a trendy statement piece or accent. As far as investment rugs go, handmade woven or knotted rugs offer unparalleled craftsmanship that will last a lifetime and are worth the money.

3.     Shape
Keep the big picture in mind when choosing the right shape rug for your room. It helps to think about what types of shapes are already present in your décor, and how a rug will frame the whole space. Your best bet is a rectangular rug—it will never go out of style and will work well with most room arrangements.

4.     Color
When making a big investment in a rug, it can be scary to decide on colors and style. Oriental-style rugs often incorporate a variety of colors, which are ideal for matching all kinds of color palettes as your décor changes throughout the years. Don’t be afraid to go with a colorful rug, but evaluate what potential color schemes will work well with it before you buy. Select a rug color that truly aligns with your personal décor style, and then you can be sure it will fit whatever you choose to combine it with in the future.

For rugs you can shop by size, materials, shape, and color, we of course think Wayfair is a great option.

Bio: Catie Parrish relishes the opportunity to inspire others to create thoughtful, stylish spaces in their homes. A graduate of Drake University, Catie lives in Boston with her news-nerd husband, Chris, and their wrinkly rescue mutt, Gus. An ardent enthusiast of all things tasty, curious, or pretty, when Catie isn’t writing, you can likely find her whipping up a batch of guacamole, captivated by a good book, or on the hunt for the sofa of her dreams. Catie is the managing editor at Wayfair, the internet’s largest furniture store.

10.21.2013

modern baby blanket


Even though I started knitting at the age of 8 (and learned to crochet about a year ago) I have never made anything bigger than a scarf. When I found out that my cousin, Janet, was pregnant with a little boy (due in November) I thought it was time I tried my hand at crocheting a baby blanket.

I started by scouring Pinterest for baby blanket ideas and fell in love with many of the styles that involved stripes. I ran to Michael's to pick up some yarn to get started.

... here's what you'll need to make your own ...

5 skeins of your favorite yarn
corresponding crochet hook


... instructions ...

Chain 101 stitches.

SC into second chain from hook and into all stitches. 
Continue SC until your first band of color measures about 12".

Switch colors and continue SC until you've used all 5 colors.
Your finished blanket will measure about 36"x60".


Photobucket
[p.s. this post may be linked to any number of these blogs]

10.10.2013

guest post: decor for tiny rooms

Hello I am Amber from The Vanity Room. I have a passion for interior designing and blogging is the perfect platform to quench my creative thirst.  I love to indulge in the internet and dig for ideas as I feed off the inspiration. I am very thankful to Shannon for letting me contribute to her blog. She is an extremely humble person with an amazing down to earth personality. Today I will be sharing with you some of my favorite DIY ideas to decorate tiny rooms in our house.

Decor For Tiny Rooms


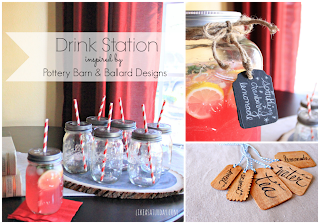
Small rooms can be frustrating as they are difficult to decorate.  Many of us have small rooms that we have to live in and deal with on a day to day basis. This means that most of us, with more meagerly proportioned rooms, are left wondering how on earth we can make the best of our tiny rooms.

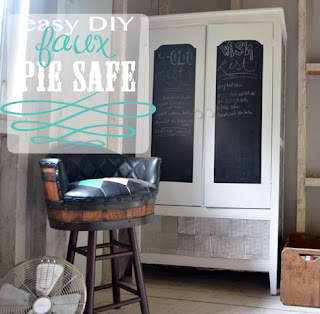
Good choice and use of furniture is key in any small room – more so, in my opinion, than in a larger room. Choose furniture that precisely fits into place, whether it is a table under the window, a bookcase across the narrowest wall or even a storage unit fitted along the longest wall. While these bigger than expected pieces of furniture may take up a reasonable amount of room, they more than make up for it by optimizing the storage space available in the room – which frees up the rest of the room, making it seem that little bit bigger! 

Mirrors should be installed in every small room. Different types of mirrors can be used. Choose the biggest mirror you can find, or even use mirror tiles. Position the mirror across the narrowest point of the room, as the mirror's reflection will appear to double that small area, opening the room out to a more generous size. 


Make good use of the full height of any room – whether it is in the kitchen, conservatory or living room! Bookcases that reach up to the ceiling are considerably more capacious than one that only reaches to head height! You can buy some incredible bookcases from Ikea.


Bathrooms are often low-level rooms, which is a sad waste of all that space near the ceiling! Install narrow shelves that run around most of the bathroom to make space for bulk purchases of soap, shampoo and toothpaste and you will make the bathroom seem bigger in the process! I saw some amazing bathroom accessories at My-bathrooms. Under basin storage is a must in any small bathroom, as this makes good use of otherwise wasted space. Apply your DIY skills here; all you will need is some paint and an old table. Paint the old table in matching color to your bathroom and insert it under the sink. If your shower has a frosted glass or plastic door, think about changing this for a fabric shower curtain which can be pushed to one side to 'open' out the room a bit more.


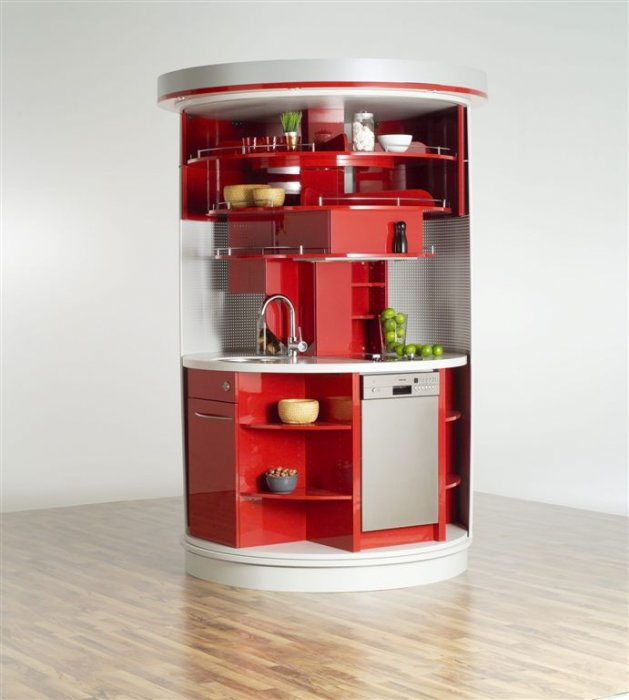
In the kitchen there is often a huge array of equipment, tins and other foodstuffs that need to be stored safely. Invest in fold-out, rotatable cabinets to maximize the use of every inch of available space. 


Large televisions, while much thinner and less bulky than older models, still take up a fair amount of space. Limit their footprint by wall mounting large TVs, which then removes the need for a television stand. 


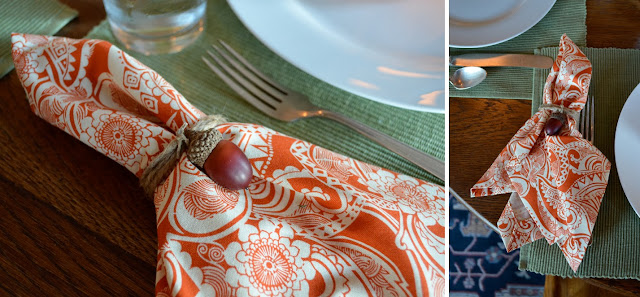
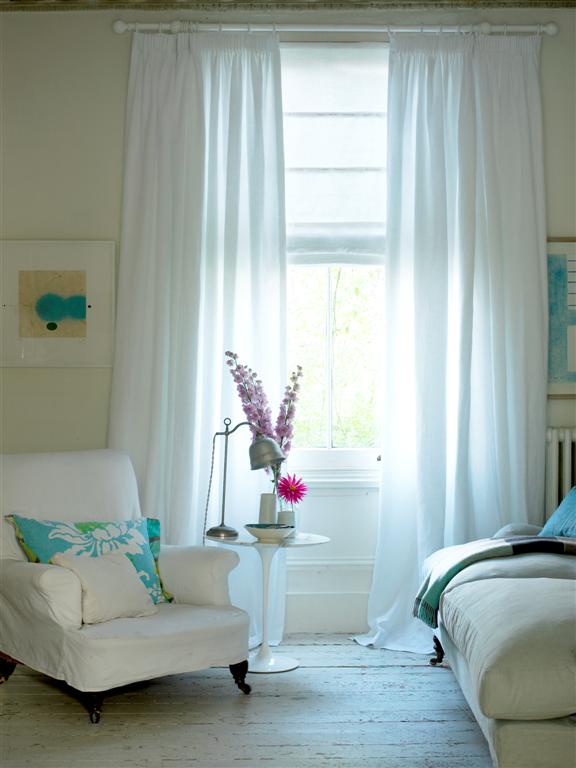
Choose plain furniture for small rooms as bright, busy patterns can make the furniture look big and bulky; too obtrusive for the dimensions of a smaller room. Use light paint or wallpaper to further add an open feeling to small rooms, and think about raising the pelmet as high as possible. Small rooms acquire an air of grandeur from a long, graceful fall of fabric. Use optical illusions to transform small and poorly proportioned rooms; for example adding stripes to counteract the effect of a long thin room, and picking out unusual room features (such as a large chimney breast) in contrasting paint colours. 


These few ideas and hints are very easy to implement and will hopefully inspire a fresh determination to decorate your small rooms, and give you some ideas on how to make a small but perfect interior – no matter where in your home it may be!

10.07.2013

sweater vase

This was originally published as a guest post for Cocktails With Mom.

Photobucket

Fall is all around (even though it has been 80 degrees in PA all week). One of my favorite fall decorations is this cozy sweater vase. I have a number of generic, glass vases sitting around my house so I decided to spruce one up for Fall.

... here's how I did it ...

I started by disassembling a sweater I picked up from The Salvation Army. I had originally gotten it to make these sweater pumpkins but had plenty left over for other projects. For this, I used a section of sleeve and slid it on over my vase.

PhotobucketPhotobucketPhotobucket

To cover the raw edge at the top, I simply made a linen "ribbon" by cutting a piece of fabric to the length I needed, sewed it together, turned it right side out and top stitched it to finish it off. After trimming off my loose threads, I tied it nicely around the top of my vase.

PhotobucketPhotobucketPhotobucket

I used a glue dot to keep the "knot" secured to the glass, however the rest of the sweater just fits snug enough around the vase to stay put. I decorated my finished vase with our wedding flowers we had left over (we used all artificial and I love having them around the house). This inexpensive, simple spruce up was perfect for turning my "blah" vase into a fun, centerpiece. 

Photobucket
Related Posts Plugin for WordPress, Blogger...