search this blog

Showing posts with label Look For Less. Show all posts

1.29.2014

"look for less" january challenge

It's that time again! We're having our January "look for less" design challenge! (If you missed the last one - you can check it out HERE)

The idea behind this challenge is to find a look you absolutely love but cost more than you're like to spend and then DIY it on a budget for much less than what you could buy it for. Since I am always looking for a bargain (and always DIYing something rather than buying it) this challenge is right up my alley!
Please meet the other girls participating in the challenge:
Rachel | Like a Saturday
Andrea | Life Love Larson
Kayla Home Coming


my January "look for less" project:
diy bathtub caddy


I got my inspiration for this bathtub caddy from none other than Anthroplogie (it's only my favorite store). The shower caddy from Anthropologie cost $168. It's beautiful, rustic, has a little spot for a wine glass - absolutely perfect. The only thing not perfect for me was the price. Living on a budget makes you look at things differently. I looked at that beautiful shower caddy and thought "my husband could make me one of those!"... and so the project began.

Since Adam is the carpenter in our family, he took this project on as his own. I helped along the way with drawings, dimensions, etc. 

Here's how the process went:

1) I measured our new tub and came up with these basic dimensions. I knew I wanted it to be 4 boards wide (which put it around 11"-12") and the width from the wall to the edge of the tub was 29":


Doing the dimensions and drawings prior to any shopping gave us an idea of how much material we'd need to buy.

2) Next, Adam ran to Lowe's to pick up the wood we needed. If you're making your own, here's a list of what you'll need:

shopping list
 two 2x4s (or at least 10' of board)
one 1x2 for the "legs" (or at least 2' of board)
water-based polyurethane
foam brush for applying poly
wood screws

(We used poplar because it is inexpensive, easy to work with and matches other things in our bathroom.
You can use whatever type of wood you'd like - and stain it if you'd like a different look.)

3) After everything was purchased, it was time to cut the pieces down to size. Using his circular saw, Adam cut the 2x4s into 29" pieces (making sure the ends lined up perfectly). The 1x2 was cut into 2 pieces - both were 11" long.


4) Prior to assembly, everything was thoroughly sanded and coated 4-5 times with polyurethane to keep it safe from water. We did the poly before assembly because it would have been too hard to get into all the cracks afterward. Once everything had dried, Adam screwed the 1x2 pieces into the 2x4s to hold everything together.


I am absolutely in LOVE (with my husband ANNNDDD my new bathtub caddy). 
I can't wait for many bubble baths, books & wine (or orange juice) this winter.

Photobucket

If you think my project is cool, make sure you check out the other projects done by the other design challenge ladies. They are so amazing - and they blow mine out of the water!!


build a focal wall headboard   

             designer inspired large-scale art & frame                         faux fur vanity stool

   glass bottle lamp                                           work bench


10.30.2013

"look for less" design challenge


When I was contacted to be part of a "Look for Less" design challenge with some other amazing bloggers, I jumped at the opportunity. The idea behind this challenge was to find a look I loved but was too expensive for my taste or budget, then DIY it myself for less. 
Please meet the other girls participating in the challenge:
Rachel | Like a Saturday
Andrea | Life Love Larson
Kayla Home Coming


My "Look for Less" project:
DIY Anthropologie Tee-pee Coasters


When I stumbled across these adorable linen coasters on the Anthropologie website, I was immediately smitten. I am a firm believer that you can never have too many coasters around. Even though I do shop at Anthropologie for unique home decor items, I couldn't justify spending money on something I knew I could make. My coasters turned out to be free since I had all of the materials on hand from other projects. If you were to buy the linen & embroidery thread to complete this project you'd probably spend around $5.00 - $7.00.

... what you'll need to make your own ...
(list below makes 4 coasters)

8 - 5"x5" pieces of linen
4 - 5"x5" pieces of fusible white felt
brown embroidery thread
sewing machine/thread
pencil
needle
ruler

... instructions ...

STEP [1]
Cut out 8 - 5"x5" linen pieces (2 pieces per coaster). With a pencil & ruler, doodle your tee-pee design on your linen. I didn't worry about making each tee-pee identical. 


STEP [2]
Cut out 4 - 5"x5" pieces of fusible felt (1 piece for each coaster). Iron the felt to the back of the 4 pieces of linen that have tee-pees drawn on them. The felt will help stabilize your stitching and give your coasters some loft.


STEP [3]
With your needle & embroidery thread, begin stitching the outline of the tee-pee. Once the outline is complete, fill in the center of the tee-pee with diagonal stitches across the design.

STEP [4]
With the extra 4 pieces of linen, sew the right sides of your coasters together (your felt should be facing out) leaving a small space to turn your coaster right side out. Press flat & top stitch about 1/8" in around the entire coaster to close the space used to turn your coaster. Ta-da! You've completed your first coaster. Repeat all steps for the remaining 3 coasters.

Click on the images below to check out all of the other amazing "Look for Less" projects completed during this design challenge:
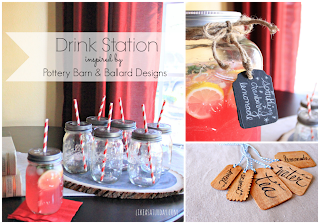
 http://likeasaturday.com/2013/10/30/look-for-less-drink-station/
 http://gracelangdon.blogspot.com/2013/10/design-challenge-look-for-less.html


Photobucket
[p.s. this post may be linked to any number of these blogs]
Related Posts Plugin for WordPress, Blogger...